Importing students
For the latest instructions using the upgraded e-asTTle tool, visit e-asTTle - Managing student data on Tāhūrangi.
Student and group data must be imported into e-asTTle using a data file from your SMS system.
Importing will need to occur on a regular basis to keep your student and group details up to date in e-asTTle.
The following outlines the five-step process you will need to carry out to import student and group data into e-asTTle.
1. Check that you have the right access in e-asTTle to carry out imports
Your role must include e-asTTle administrator to be able to import student records.
If you are unsure of your role set up, log in to e-asTTle and check the options available on the left menu.
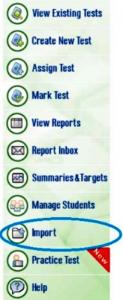
If you can see "Import" on the left menu, your role includes administrator.
If you cannot see "Import" on the left menu, contact your school’s Delegated Authoriser to get "administrator" added to your role.
If you’re unsure who your Delegated Authoriser is, contact the Education Service Desk.
- 0800 422 599
- [email protected]
2. Export your "student details" file from your SMS
You will need to export a file including all your students and associated classes from the SMS your school uses. Choose the user guide for your SMS from the selection below for instructions on how to export your student data.
User guides to download for Edge and eTap
Links to user guides for KAMAR, PC School, LINC-ED Hero, and Synergetic
- KAMAR
- PCSchool (you will need to be logged in to access information on this site)
- LINC-ED Hero
- Synergetic
3. Import "student details" file into e-asTTle
Imports should be carried out outside of school hours because importing:
- overwrites classes and may affect teachers assigning tests to classes
- may also affect the responsiveness of the application for students in your school and other schools.
Steps to import your file into e-asTTle
Log in to e-asTTle and select "Import" from the left-hand menu.
- Select "Choose File".
- Navigate to the location where the file is saved.
- Select the filename and then select "Open". The file name will appear in the text box that is on the screen.
- Select "Submit".
- Select "OK" on the confirmation pop-up.
Your file size must be less than 1MB. The larger the file, the longer you may have to wait until the import completes. This could take a few minutes.
Once the file has finished importing, your screen will refresh and show details on how your import went in the "Import History" table. This table holds the most recent ten import records.
Why is the status of my import "Rejected – file format incorrect"?
If the file format does not meet e-asTTle’s requirements the import process is stopped. You will see a red error message at the top of the screen "File does not meet formatting requirement, please contact your SMS vendor … "
It is important that you contact your SMS vendor in order to address the formatting errors in the file. Once the file formatting errors have been resolved, repeat the instructions in Step 3.
4. Check if there are student details you need to overwrite
Status – "Complete – no action required"
If all student details such as names and NSN match, the file will import with the status "Complete – no action required".
This means that all students and associated classes have been imported successfully into e-asTTle. You can verify this by selecting Manage Student from the left menu and checking student and group information.
Status – "Incomplete – action required to update students"
Often, the student details file will contain some information that does not match the student details in e-asTTle. Only the student records in the file that e-asTTle considers a match will be automatically imported.
Anything with an error will require manual validation. These records will be listed in the "Matched Records" table and require you to overwrite the details in e-asTTle with the spelling from your SMS.
If you’re sure the difference is just a typing error and your SMS spelling is correct, select the "Yes" radio button.
Once you have selected the students you want to update, select the Save button.
Be aware that if you move to another screen without selecting Save, you must re-import your file and go through the manual validation process again!
If it looks like your SMS details are wrong for any reason such as the details in e-asTTle look like they’re right, leave the radio button set to "No". You’ll need to fix your SMS and re-run steps 2-4.
Once no further manual validation is needed, the status will display "Complete – no action required".
5. Check for Errors
Occasionally you will see "Errors" after carrying out an import. This happens when student details in the import file are very different from the student record in e-asTTle.
In these instances, the student record will need to be updated manually in e-asTTle or in your SMS.
How to find your import errors
Select the "Incomplete – action required to update students" link.
Select the "Errors" link in the Import Summary table.
Common errors
The following are the four most common import errors. Click on the error link to see information on what the error means and how to resolve it.
- NSN ID nnn already in use by a student. Please contact the Sector Service Desk to restore the student.
- Update of student failed due to duplicate sms_id within school.
- More than one possible match found for student.
- NSN and Gender matched; First Name, Last Name and SMS_ID do not match record in e-asTTle.
- Related information


