Marking a paper test
For the latest instructions using the upgraded e-asTTle tool, visit e-asTTle - Marking tests on Tāhūrangi.
Selecting a test
- Select "Mark Test" from left menu
- Select appropriate fields to search by using the "Test Information" drop-downs
- Select "‘Search".
- Select your "Test Name" in the Test Table. You may need to scroll down to find it.
Hints:
- Use CTRL + F to search for a keyword in your test name.
- You can find all tests in the school by clicking on the blank option for each filter drop-down.
- Tests can be sorted in ascending or descending order by clicking on the arrows next to the blue column titles. For example, clicking the Test Name column sorts tests in alphabetical order.
Finding your paper assignment
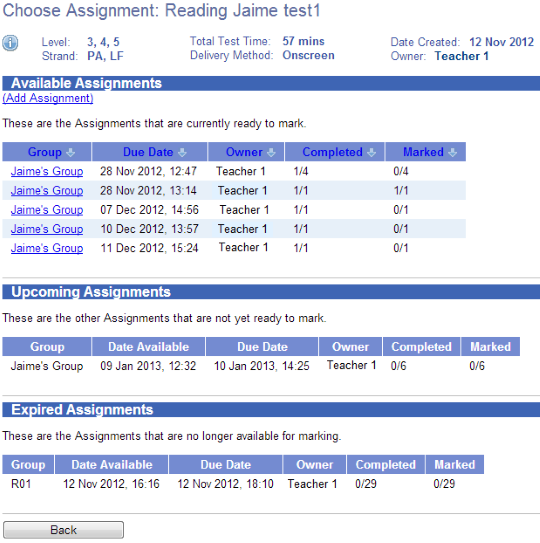
Once you select a test, the "Choose Assignment" screen displays. Select the relevant assignment group to begin marking. Assignments are organized by their type:
- Available Assignments – those ready to be marked.
- Paper tests are available to mark as soon as the Date Available has passed.
- Upcoming Assignments – those not yet ready for marking.
- This is because the Date Available has not passed yet.
If your paper test does not display, you may have forgotten to assign it.
See Assign Test for more information.
Entering Marks
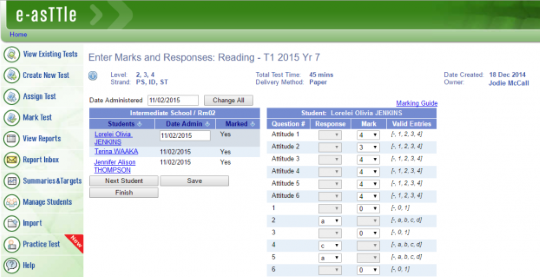
- Select the student you wish to mark from the "Group" table (left-hand side).
- Ensure the correct Date Administered displays, to make sure reports display correctly. To change "Date Administered" for all students at once, enter the correct date into the "Date Administered" field and select "Change All".
- Enter student responses to the attitude and test questions in the "Response" table (right-hand side)
Entering responses for attitude questions
Enter the students’ responses (1, 2, 3, or 4) in the "Response" column. Enter a dash (-) for unanswered questions.
Entering responses for multi-choice questions
Enter the students’ responses (a, b, c, d or e where applicable) in the "Response" column. Enter a dash (-) for unanswered questions, or where a student has selected more than one answer. Multi-choice questions are automatically marked as correct or incorrect.
Entering responses for other question types
Select the Marking Guide link and use the guide to help you assign marks for open-ended questions. Enter 0 for an incorrect response and 1 for a correct response.
For questions worth multiple marks, the drop-down will include extra options.
Enter a dash (-) for unanswered questions.
Next steps
After you have entered a student’s marks either:
- select "Next Student" to enter the responses for the next student in the table or
- select the link of the student’s name that you wish to mark next.
Complete the table for all students. As you save the completed responses for each student you will notice that the "Marked" column changes from "No" to "Yes". When you have completed your marking for all students select the "Finish" button.
Hints
- When you select "Next Student"’ or select a student’s name, the responses will automatically be saved. You can also select "Save" at any point to save all the responses you have entered so far.
- When entering answers the highlighted box will move to the next question if a valid entry has been put in the previous box. This is far quicker and more efficient than using the drop downs for each question
- If you accidentally leave some responses blank, a message will appear warning you the student won’t be included in reports.
- Related information


